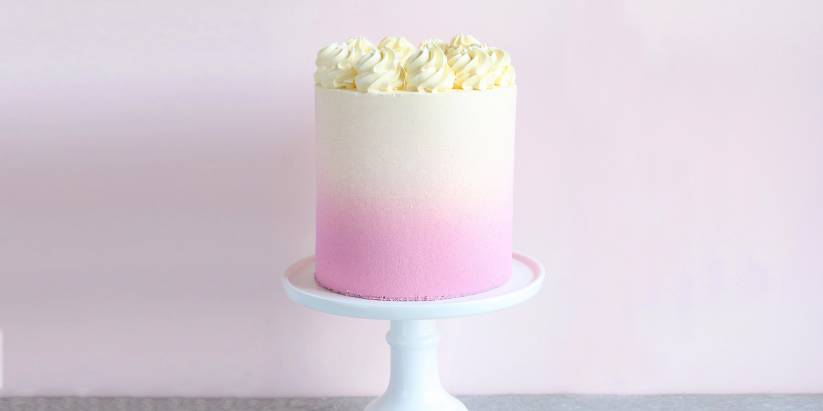
Double Choc Macaroon Velvet Cake
| Serves: | 16-20 |
| Preparation time: | 4-5 hours + cooling |
You will need:
Ingredients:
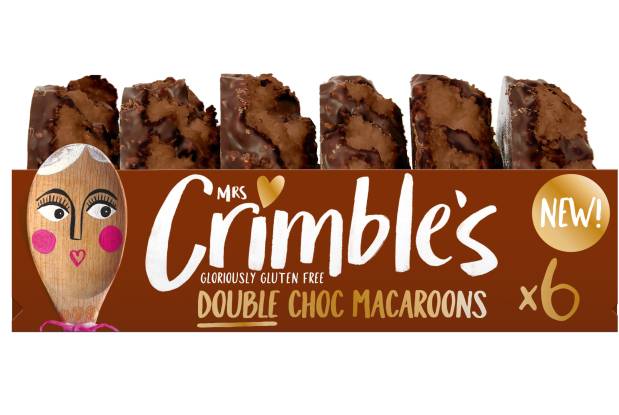
- 6 DOUBLE CHOC MACAROONS
Equipment:
4 x 7” cake tins
Offset spatulas
1 x 8” cake board
Cake scraper
Chocolate cake:
420ml water
110g good quality cocoa powder
440g plain flour
700g caster sugar
1 ½ tsp salt
2 tbsp baking soda
420ml whole milk + 2 tbsp lemon juice
300ml vegetable oil
4 large eggs
2 tsp vanilla paste
150g chocolate chips
Swiss meringue buttercream (you will need two batches):
250g egg whites
205g caster sugar
475g unsalted butter, room temperature (has to be soft or it won’t work!)
Pinch salt
1 ½ tsp vanilla paste
Filling:
6 Mrs Crimble’s Double Choc Macaroons
Velvet Spray:
200g cocoa butter
200g white chocolate
Pink gel food colour (or any colour of your choice)
Method
For the chocolate cake:
- Place the water into a pan and bring it to a boil over a medium heat. Once at a boil, turn the heat off, whisk in the cocoa powder and allow it to cool slightly.
- Pour the milk into a jug and stir in the lemon juice – allow it to sit for a few minutes (it will look slightly curdled but that’s fine – we are making buttermilk)
- Put the sugar, baking soda, flour, and salt into a large bowl or the bowl or a stand mixer and whisk together.
- Whisk together the eggs, oil and vanilla. Pour this mixture into the dry ingredients, mixing on a low speed and then pour in the buttermilk. Beat on medium/low for 30 seconds – 1 minute until it is combined, and you can’t see any more dry ingredients.
- Still mixing at a low speed, pour in the cocoa powder-water until it is combined. Be sure to scrape the bottom of the bowl to ensure everything is incorporated.
- Coat the chocolate chips in a little bit of flour then fold them into the cake batter. The cake batter will be very liquid – don’t panic!
- Grease 4 x 7” cakes lightly with butter and place a circle of parchment paper on the bottom of each tin. Coat the sides of the tin with cocoa powder too. Pour the batter into the cake tins, you should have roughly 580g of batter per cake tin.
- Bake the cakes in a pre-heated oven at 175C/350F for 30-35 minutes or until a skewer comes out clean.
- Remove the cake tins from the oven and run a knife around the edge to loosen the cake. Carefully flip the cakes onto a wire rack and allow to cool for at least an hour.
For the swiss meringue buttercream:
- In the bowl of a stand mixer or a large bowl, whisk the egg whites with the sugar and salt over a pan of gently simmering water (making sure the water doesn’t touch the bowl) and whisk together until the mixture reaches 65°C/149F on a digital thermometer.
- Once at temperature, place the mixture into the bowl of a stand mixer and with the whisk attachment, whisk the egg whites on a medium high speed for about 7 minutes or until the bowl feels cool to the touch.
- Once the meringue is cooled, start adding soft butter slowly with the mixer on a medium high speed (about a tbsp at a time) until it is fully incorporated. The mixture will initially look quite soupy, and then curdled but just keep whisking – it will come back to form a smooth buttercream about 2 minutes after all of the butter is incorporated. Add the vanilla and whisk for about another 1 minute at medium-high speed until the buttercream appears smooth.
Assembly 1:
- Place the Mrs Crimble’s Double Choc Macaroons into a food processor and blitz until they form a crumbly mixture.
- Place one of the layers of chocolate cake onto an 8″ cake board, sticking it down with a small amount of buttercream.
- Take a spatula of buttercream and dollop this onto the first cake layer. Spread it out with an offset spatula until it is level and reaches the edges. Sprinkle on a coating of blitzed Mrs Crimble’s Double Choc Macaroons on top of the buttercream.
- Place your second layer of cake on top and repeat this process.
- Once you’ve added your third layer of buttercream, flip the 4th layer of cake upside down, so the smooth side is facing up, and place this on the top of the buttercream. Level the cake as much possible with your hands, pressing it down, so that it is nice and flat.
- With an offset spatula, apply a thick layer of buttercream to the top and the outside of the cake and then using a bench scraper, rotate the cake, scraping off the excess buttercream. You should be left with a nice thin crumb coat around the outside of the cake. Use an offset spatula to smooth the top of the cake then place the entire cake in the fridge for 30 minutes (or the freezer for 15 minutes if yours can fit a cake in!). Now is the time to make the second batch of swiss meringue buttercream.
- Once chilled, remove the cake from the fridge – it’s now time to coat it with the final layer of buttercream. In a similar technique to the crumb coating, spread the buttercream around the entire cake, then using a bench scraper or a palette knife, smooth the edges, scraping off any excess buttercream into your bowl. The key to smooth edges is doing it in one quick motion, so hold your hand steady with the bench scraper, and rotate the cake 360 degrees without stopping. If you stop midway, you will end up with bumps and lines etc. Smooth the cake 5/6 times, filling in any gaps you might make with a little extra frosting until you are happy with it.
- Add buttercream to the top of the cake and smooth this out with a palette knife. Once you are happy with the cake, pop it in the freezer while we make the velvet spray.
For the velvet spray:
To spray your cake, you will need a paint sprayer – they are readily available on the internet and from DIY stores. As an alternative, velvet spray can also be purchased in a ready-made form in a can!
- Add the cocoa butter and white chocolate to a bowl (make sure they are chopped to similar size pieces) and place it over a pan of gently simmering water.
- Stir the mixture together until it is completely melted then remove it from the heat. At this point, if you have a stick blender, add the mixture to a jug and blend it along with a drop of pink gel food colour. If not, add the gel food colour to the bowl and whisk it through.
- The mixture is best sprayed when it has cooled to 45C. If you don’t have a thermometer, just allow it to cool for about 5 minutes and then it should be ready to spray.
- Remove your cake from the freezer and place it onto a rotating cake stand so that you can spin around. Be sure to put the cake in a large box or put a dust sheet up behind it as this can get messy!
- For this cake, we are going to create an ombre effect. Pour the chocolate mixture into your spray gun, and starting at the bottom of the cake, spray the cake while spinning it from about 30cm away. Cover the entire bottom ¼ of the cake and then as you begin to move up the cake, reduce the amount of velvet spray you are applying. This should result in an intense velvet effect at the bottom, gradually thinning out as you reach the top of the cake. Leave the top of the cake as we will decorate that now.
Final Assembly:
- To finish the cake, take some remaining buttercream and add it into a piping bag along with a star tip piping nozzle.
- Pipe swirls of buttercream all around the top of the cake to create a crown.
- Allow the cake to sit at room temperature for 3-4 hours before serving so that the buttercream can warm up!